Gatsby SEO Component
This is a 4 part series about building SEO-optimized Gatsby blog.
In Part 3, we will create an SEO component, which will render Twitter, Open Graph, and Schema.org meta tags.
Then we will cover all the necessary tools for validating the markup.
At any point of time feel free to checkout the source code in GitHub or the live blog.
Let's take a few moments to familiarize ourselves with the project structure.
Click on the folder to expand/collapse- articles
- golden-retriver
- cover.jpg
- index.mdx
- pug
- cover.jpg
- index.mdx
- siberian-husky
- cover.jpg
- index.mdx
- src
- images
- about.jpg
- blog.jpg
- contact.jpg
- home.jpg
- components
- Layout
- index.jsx
- Nav
- index.jsx
- SEO
- DefaultMeta.jsx
- OpenGraph.jsx
- SchemaOrg.jsx
- Twitter.jsx
- getActivePages.js
- getCurrentUrl.js
- getImageUrls.js
- index.jsx
- fragments
- FrontmatterFields.js
- ImageUrlFields.js
- helpers
- slashify.js
- hooks
- useSiteMetadata.js
- pages
- about.jsx
- blog.jsx
- contact.jsx
- index.jsx
- templates
- article.jsx
- static
- logo.jpg
- .nvmrc
- .env.development
- .env.production
- site-metadata.js
- gatsby-config.js
- gatsby-node.js
- package.json
The SEO Component
The SEO component receives data from every page and acts as a wrapper for other, smaller components. Based on the
received data it constructs imageUrls, activePages objects, and an url string that is passed down the
components tree to DefaultMeta, Twitter, OpenGraph, and SchemaOrg.
import React from "react"import DefaultMeta from "./DefaultMeta"import OpenGraph from "./OpenGraph"import Twitter from "./Twitter"import SchemaOrg from "./SchemaOrg"import useSiteMetadata from "../../hooks/useSiteMetadata"import getActivePages from "./getActivePages"import getImageUrls from "./getImageUrls"import getCurrentUrl from "./getCurrentUrl"const SEO = ({pathName,slug,title,description,images,imageAlt,pageId,type,breadcrumb,published,modified,}) => {const {siteUrl,siteName,firstName,lastName,language,socialMedia,logo,address,speakableSelector,pages,} = useSiteMetadata()const imageUrls = getImageUrls({ images, siteUrl })const activePages = getActivePages({ pages, pageId })const url = getCurrentUrl({siteUrl,pathName,slug,pages,activePages,})const defaultMeta = {title,description,language,url,}const twitter = {title,description,imageUrls,imageAlt,socialMedia,}const openGraph = {siteName,firstName,lastName,title,description,imageUrls,imageAlt,modified,published,language,activePages,url,}const schemaOrg = {siteUrl,siteName,firstName,lastName,logo,language,socialMedia,address,speakableSelector,pathName,title,description,imageUrls,breadcrumb,type,modified,published,slug,pages,activePages,url,}return (<><DefaultMeta {...defaultMeta} /><Twitter {...twitter} /><OpenGraph {...openGraph} /><SchemaOrg {...schemaOrg} /></>)}export default SEO
The getImageUrls Helper Function
After applying the ImageUrlFields fragment
on a File node we get back a deeply nested object with multiple relative paths. The purpose of the getImageUrls
function is to generate a URL for every path and pack it in a concise object.
const getImageUrls = ({ images, siteUrl }) =>Object.entries(images).reduce((acc, image) => {const [key,{images: {fallback: { src: path },},},] = imageconst url = `${siteUrl}${path}`acc[`${key}ImageUrl`] = urlreturn acc}, {})export default getImageUrls
The getActivePages Helper Function
All page types have different markup templates. For example, the /contact page corresponds to the
ContactPage schema and the /blog/pug/ page corresponds to the
Article schema. However, there is no mechanism within the SEO
component to distinguish between these two pages, and therefore no way of knowing which template to use.
The getActivePages helper takes care of identifying the page type of the received data. It does
this by checking the pageId prop against a list of all pages defined in
site-metadata.js. Later on, we will rely
on its output to map pages with their corresponding templates.
const getActivePages = ({ pages, pageId }) =>Object.entries(pages).reduce((acc, page) => {const [name, { id }] = pageconst firstLetter = name[0].toUpperCase()const remainingLetters = name.substr(1)const key = `is${firstLetter}${remainingLetters}`acc[key] = id === pageIdreturn acc}, {})export default getActivePages
The getCurrentUrl Helper Function
getCurrentUrl returns the page URL based on the output from the getActivePages helper.
import slashify from "../../helpers/slashify"const getCurrentUrl = ({siteUrl,pathName,slug,pages: {blog: { pathName: blogPathName },},activePages: { isHome, isArticle },}) =>isHome? siteUrl: isArticle? slashify(siteUrl, blogPathName, slug): slashify(siteUrl, pathName)export default getCurrentUrl
The DefaultMeta Component
Before adding the DefaultMeta component, we will need to install react-helmet and
its corresponding Gatsby plugin gatsby-plugin-react-helmet:
yarn add react-helmet gatsby-plugin-react-helmet
Update gatsby-config.js:
// ✂️module.exports = {// ✂️plugins: [`gatsby-plugin-react-helmet`,// ✂️],}
react-helmet is a document head manager for React, while gatsby-plugin-react-helmet provides a drop-in support
for server rendering data added with React Helmet.
import React from "react"import Helmet from "react-helmet"const DefaultMeta = ({ title, description, language, url }) => {const lang = language.replace(`_`, `-`)return (<Helmet><html lang={lang} /><title>{title}</title><meta name="description" content={description} /><link rel="canonical" href={url} /></Helmet>)}export default DefaultMeta
The Helmet component takes your HTML tags and renders them inside of the head tag.
For the lang attribute we replace _ on - to follow BCP 47.
The Twitter Component
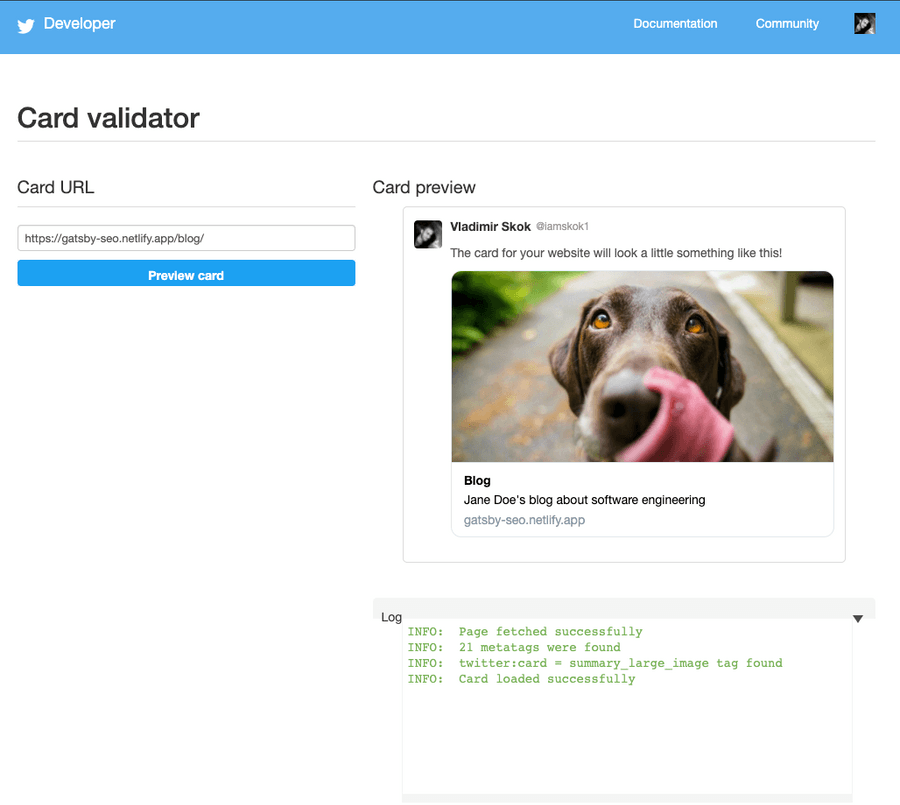
The Twitter component contains Twitter specific meta tags. When the URL on your blog
is shared via Twitter, it will be expanded in an attractive summary card with a large image.
import React from "react"import { Helmet } from "react-helmet"const Twitter = ({title,description,imageUrls: { twitterImageUrl: image },imageAlt,socialMedia: { twitter: creator },}) => (<Helmet><meta name="twitter:card" content="summary_large_image" /><meta name="twitter:title" content={title} /><meta name="twitter:description" content={description} /><meta name="twitter:image" content={image} /><meta name="twitter:image:alt" content={imageAlt} /><metaname="twitter:creator"content={new URL(creator).pathname.replace(`/`, `@`)}/></Helmet>)export default Twitter
twitter:cardis a type of card. We use "Summary Large Image" to create a prominent, full-width image beside the tweet.twitter:creatoris the person who wrote this content, so its value has to be a Twitter handle starting with the@symbol.
To learn more about Twitter cards, check out their documentation.
<meta name="twitter:card" content="summary_large_image" /><meta name="twitter:title" content="Jane Doe" /><meta name="twitter:description" content="Jane Doe's place on the web" /><meta name="twitter:image" content="https://gatsby-seo.netlify.app/static/0cf5c621d3f5b6ef8b857e489c39e2e5/c3xs4/home.jpg" /><meta name="twitter:image:alt" content="Two corgis sitting next to each other" /><meta name="twitter:creator" content="@gatsbyjs" />
The OpenGraph Component
The Open Graph protocol is supported by a wide range of social media platforms, including Facebook (which created this protocol in 2010), LinkedIn, Pinterest, and Twitter (when Twitter can't find Twitter meta tags, it reverts to Open Graph), and others. To learn more about it, you can have a look at the Open Graph protocol documention.
The OpenGraph component renders markup based on the provided page type. This is when getActivePages
becomes handy.
import React from "react"import { Helmet } from "react-helmet"const OpenGraph = ({siteName,firstName,lastName,title,description,imageUrls: { openGraphImageUrl: image },imageAlt,modified,published,language,activePages: { isArticle },url,}) => (<Helmet><meta property="og:type" content={isArticle ? `article` : `website`} /><meta property="og:url" content={url} /><meta property="og:site_name" content={siteName} /><meta property="og:locale" content={language} /><meta property="og:title" content={title} /><meta property="og:description" content={description} /><meta property="og:image" content={image} /><meta property="og:image:alt" content={imageAlt} />{isArticle && published && (<meta property="article:published_time" content={published} />)}{isArticle && modified && (<meta property="article:modified_time" content={modified} />)}{isArticle && (<meta property="article:author" content={`${firstName} ${lastName}`} />)}</Helmet>)export default OpenGraph
og:typeis the type of object represented in Open Graph (e.g. music, video, website, profile, article, etc.). In our case, this will be article when rendered inside of theArticlepage component, and website for the rest of the pages.og:urlis the canonical URL of the object.og:localeis the language of the content (when not specified, this defaults toen_US).
The following tags will be rendered only in the Article template:
article:authorarticle:published_timearticle:modified_time
<meta property="og:type" content="website" /><meta property="og:url" content="https://gatsby-seo.netlify.app" /><meta property="og:site_name" content="Gatsby SEO" /><meta property="og:locale" content="en_US" /><meta property="og:title" content="Jane Doe" /><meta property="og:description" content="Jane Doe's place on the web" /><meta property="og:image" content="https://gatsby-seo.netlify.app/static/0cf5c621d3f5b6ef8b857e489c39e2e5/c3xs4/home.jpg" /><meta property="og:image:alt" content="Two corgis sitting next to each other" />
What is Schema.org?
Schema.org is a structured data markup that helps search engines interpret the content of web pages. It was initially launched in 2011 by Google, Yahoo, and Bing. Once added to a webpage, it conveys the contextual meaning to search engines by using a hierarchical set of schemas.
HTML cannot provide the meaning of a text string. For example, a webpage can include a header of <h1>Apple</h1>, yet it
remains unclear whether it is referring to the fruit or the company. This is when Schema.org comes into play to provide semantic meaning to search engines.
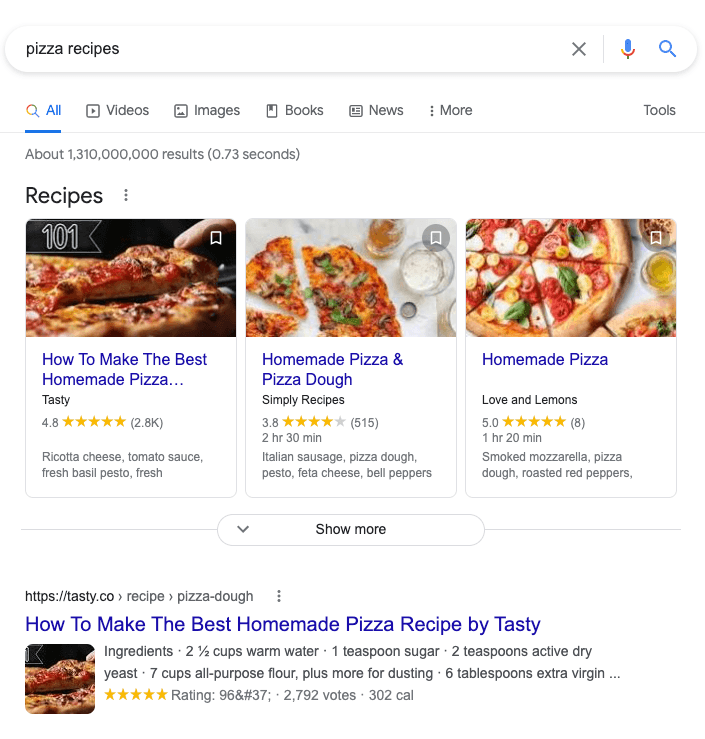
The Schema.org vocabulary is vast, so for practical reasons, we will focus only on the schemas that Google officially supports. This way, we are going to help the search engines and benefit from rich results in the process (aka rich snippets which are normal Google search results with additional data displayed). Rich snippets stand out from the other search results, look more appealing, and have a higher click-through rate.

Before jumping into the code, we should clarify what a node identifier is. A node identifier is a unique @id property
that gets attached to a schema and can be referenced from inside another schema. This is extremely useful for
keeping the code DRY and readable.
Take a look at this example:
<script type="application/ld+json">{"@context": "https://schema.org","@type": "PostalAddress","@id": "https://example.com/#address","addressCountry": "US","addressLocality": "Los Angeles","addressRegion": "CA"}</script><script type="application/ld+json">{"@context": "https://schema.org","@type": "Person","@id": "https://example.com/#person","name": "Jane Doe","address": {"@id": "https://example.com/#address"}}</script><script type="application/ld+json">{"@context": "https://schema.org","@id": "https://example.com/#organization","@type": "Organization","url": "https://example.com","name": "Gatsby SEO","logo": {"@type": "ImageObject","url": "https://example.com/logo.jpg","height": 640,"width": 640},"address": {"@id": "https://example.com/#address"}}</script>
In the above example, we created a PostalAddress schema and then referenced it inside of the Person and
Organization schemas by passing its node identifier ID. If we don't take advantage of node identifiers, we will end up
having to duplicate the whole PostalAddress object inside the Person and Organization schemas.
The node identifier value can be pretty much anything, but the standard practice is to use the domain name appended with
the number sign and the schema type name as follows: https://example.com/#schema.
The SchemaOrg Component
In the SchemaOrg component we generate address, person, organization, breadcrumb, and page (WebPage, Blog,
ContactPage, AboutPage, or Article) schemas, link them together using node identifiers
and compose into a single JSON object.
import React from "react"import Helmet from "react-helmet"import slashify from "../../helpers/slashify"const SchemaOrg = ({siteUrl,siteName,firstName,lastName,logo: { pathName: logoPathName, width: logoWidth, height: logoHeight },language,socialMedia: { twitter, github },address,speakableSelector,pathName,title,description,imageUrls: {schemaOrg1x1ImageUrl,schemaOrg4x3ImageUrl,schemaOrg16x9ImageUrl,},breadcrumb,type,modified,published,slug,pages: {home: { breadcrumb: homeBreadcrumb },blog: { breadcrumb: blogBreadcrumb, pathName: blogPathName },},activePages: { isHome, isBlog, isAbout, isContact, isArticle },url,}) => {const schemaId = id => `${siteUrl}/#${id}`const fullName = `${firstName} ${lastName}`const pageUrl = slashify(siteUrl, pathName)const blogPageUrl = slashify(siteUrl, blogPathName)const articlePageUrl = slashify(siteUrl, blogPathName, slug)const schemaOrgAddress = {"@type": `PostalAddress`,"@id": schemaId(`address`),...address,}const schemaOrgPerson = {"@type": `Person`,"@id": schemaId(`person`),url: siteUrl,name: fullName,sameAs: [twitter, github],address: {"@id": schemaId(`address`),},}const schemaOrgOrganization = {"@id": schemaId(`organization`),"@type": `Organization`,url: siteUrl,name: siteName,logo: {"@type": `ImageObject`,url: slashify(siteUrl, logoPathName),height: logoHeight,width: logoWidth,},address: {"@id": schemaId(`address`),},}const schemaOrgPage = Object.assign({"@type": type,author: { "@id": schemaId(`person`) },publisher: { "@id": schemaId(`organization`) },description,headline: title,inLanguage: language,name: title,url,mainEntityOfPage: url,image: [schemaOrg1x1ImageUrl,schemaOrg4x3ImageUrl,schemaOrg16x9ImageUrl,],},isArticle &&published && {datePublished: published,},isArticle && modified? { dateModified: modified }: published? { dateModified: published }: null,!isBlog &&speakableSelector && {speakable: {"@type": `SpeakableSpecification`,cssSelector: speakableSelector,},})const breadcrumbList = [{id: siteUrl,name: homeBreadcrumb,},]if (isBlog || isContact || isAbout) {breadcrumbList.push({id: pageUrl,name: breadcrumb,})} else if (isArticle) {breadcrumbList.push({id: blogPageUrl,name: blogBreadcrumb,},{id: articlePageUrl,name: title,})}const schemaOrgBreadcrumbs = {"@type": `BreadcrumbList`,"@id": schemaId(`breadcrumbs`),name: `Breadcrumbs`,itemListElement: breadcrumbList.map(({ id, name }, index) => ({"@type": `ListItem`,position: index + 1,name,item: {"@type": `WebPage`,"@id": id,},})),}const schemaOrg = {"@context": "http://schema.org","@graph": [schemaOrgAddress,schemaOrgPerson,schemaOrgOrganization,schemaOrgPage,],}if (!isHome) {schemaOrg["@graph"].push(schemaOrgBreadcrumbs)}return (<Helmet><script type="application/ld+json">{JSON.stringify(schemaOrg)}</script></Helmet>)}export default SchemaOrg
PostalAddressconsists ofcountry,locality, andregionfields.Personconsists ofname,url(root URL),sameAs(list of social media profiles) andaddressfields.Organizationconsists ofurl,name,address(reference to thePostalAddressschema), andlogofields.
Now let's add the logo.jpg image to the ./static directory. Any file you put into this directory will be
copied to the public directory. For instance, if you add a file named dog.jpg to the static directory,
it’ll be copied to public/dog.jpg and become available at the https://<SITE_URL>/dog.jpg URL.
Once we are done with the smaller pieces, we can move on to the generic page schema. This will generate WebPage,
Blog, ContactPage, AboutPage, and Article schemas. Here is the list of properties that
are shared in all of these schemas:
typenamedescriptionauthorpublisherheadlineinLanguageurlmainEntityOfPageimage
The rest of the properties will be added conditionally depending on the page type. The article schema requires
datePublished, and dateModified, and the blog schema contains speakable field.
To conditionally add properties to the object, we leverage the Object.assign method. To avoid duplicating the
datePublished value in dateModified for every new blog post, we check if dateModified exists and then apply
it. Otherwise, we reuse the datePublished value as dateModified.
The breadcrumbList schema doesn't appear to be a part of any other schema. It consists of a chain of linked web pages.
The position property is used to order the items and starts with 1. The home page will always be the first item, which
is why we define breadcrumbList with siteUrl right away. The second level is a blog, contact, or about page.
With our URL structure, the third level will always
be an article and always go after the blog page. That's why we push both of these values to the breadcrumbList
array at once.
Once all the schemas are constructed, we create a node array using @graph and fill it in with schemas. The only
edge case we need to handle is breadcrumbList on the home page. There is no reason to have to, so it needs to be excluded by
checking the isHome variable.
{"@context": "http://schema.org","@graph": [{"@type": "WebPage","name": "Jane Doe","headline": "Jane Doe","description": "Jane Doe's place on the web","url": "https://gatsby-seo.netlify.app","mainEntityOfPage": "https://gatsby-seo.netlify.app","image": ["https://gatsby-seo.netlify.app/static/0cf5c621d3f5b6ef8b857e489c39e2e5/5bb6f/home.jpg","https://gatsby-seo.netlify.app/static/0cf5c621d3f5b6ef8b857e489c39e2e5/34erv/home.jpg","https://gatsby-seo.netlify.app/static/0cf5c621d3f5b6ef8b857e489c39e2e5/c3xs4/home.jpg"],"inLanguage": "en_US","author": {"@id": "https://gatsby-seo.netlify.app/#person"},"publisher": {"@id": "https://gatsby-seo.netlify.app/#organization"},"speakable": {"@type": "SpeakableSpecification","cssSelector": ["data-speakable=\"true\""]}}]}
SEO Component Validation
To validate Twitter meta tags, use the Twitter Card Validator tool. Make sure
that you are testing production URLs, because this tool respects robots.txt settings.

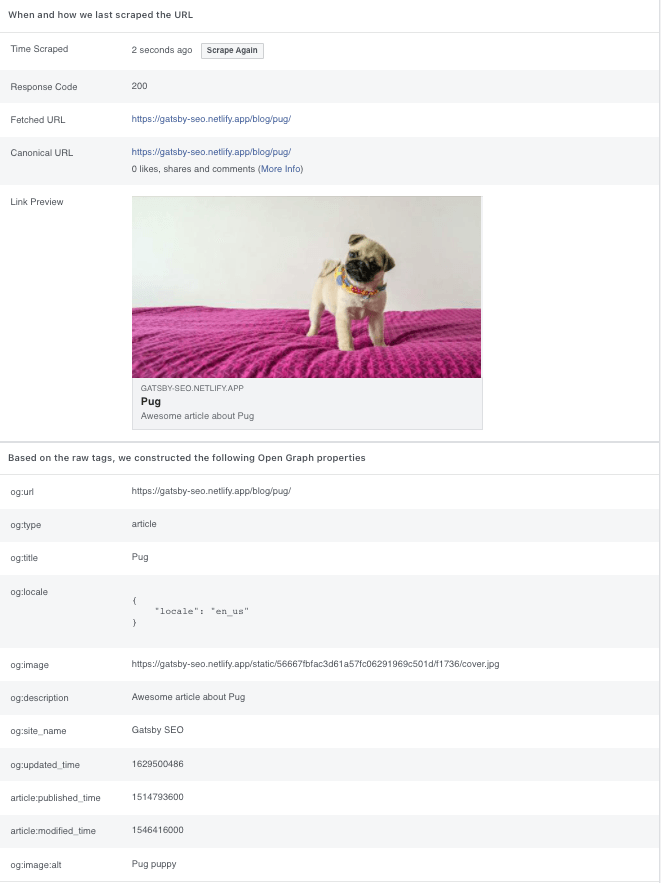
For Open Graph validation, use the Facebook Sharing Debugger. The Facebook sharing debugger caches results, so if you don't see the latest changes, click
the "Scrape Again" button to fetch the latest version of the page. After clicking the debug button, you will most likely see a
warning - "The following required properties are missing: fb:app_id". Don't panic! The fb:app_id
meta tag is not required and it doesn’t do anything nowadays anyway.

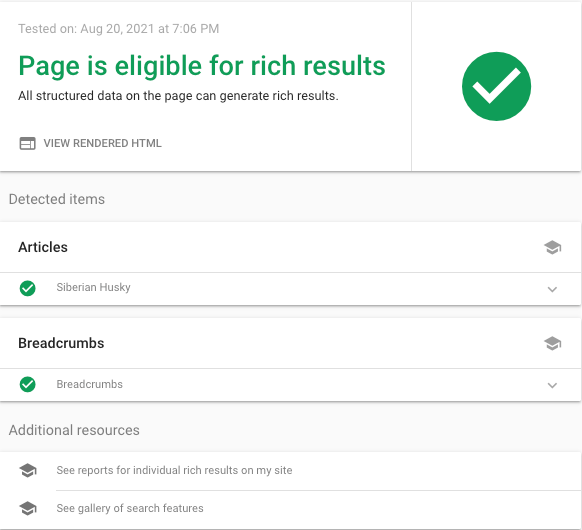
For schema.org validation, I recommend using Google Rich Results in conjunction with the Schema.org Validator. In my experience, there are times that Google Rich Results will not find specific issues whereas Schema.org Validator will, and vice versa.
